Need an Elite Dangerous guide? If you are sitting in a Sidewinder you don’t even own, with an entire galaxy waiting to be explored, chances are you do. It can be tough out there for a rookie pilot and in a way that only the merciless void of spacecan be. Don’t panic, though: the early days of Elite Dangerous can be daunting, but we will take you through the fundamentals to get you on your way to going faster than lightspeed.
In Elite Dangerous you never leave your ship so it is important to familiarise yourself with your new ride. Go through your pre-flight checks to familiarise yourself with the controls then feel free to disable this from the Functions panel. You will then want to have a bit of a fly around outside of the station. The Sidewinder is free to replace so do not worry about scuffing the paintwork. There are a couple of tutorial videos you can watch under the training tab on the main menu, too. While they are a bit dry you should at least watch the basic flight, docking, and travel ones.
Travel beyond the stars in the best space games on PC.
We will cover four main areas with this Elite Dangerous guide:
Elite Dangerous guide – the cockpit
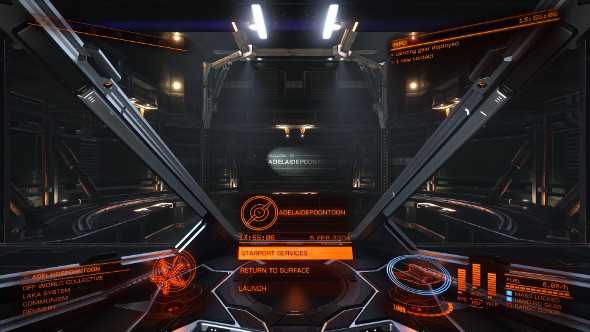
Most of the UI is pretty self explanatory but some aspects may cause some head scratching.
- Radar – This is the central circular UI. It can take some time to adjust to how it represents 3D space. Think of it as a pane of glass with your icon embedded in the center. If there are lines travelling upwards from the pane it means the target is above you. Lines travelling downwards are below you. Square targets are ships while triangular targets have their weapons deployed. Hollow targets are other players and not NPCs. To the left of the radar is the heat gauge. Flying too close to a star or relying on energy weapons can cause your ship to overheat. Ignore this at your peril.
- Compass – During supercruise (more on this below) when a target is selected a compass will appear beside the heat gauge. If the dot is solid blue the target is in front of you. If it is just a blue outline then the target is behind you.
- Mass Locked – This means you are being affected by a body’s gravity, be it a planet or even a large ship. You cannot jump to hyperspace or supercruise while you are mass locked so you will need to clear that distance. Your speed will be reduced until you get outside the influence of the gravity well, too.
Remember your manners: Always request docking when you are less than 7km from a station. They do not take kindly to ships flying into their mail slots without permission. As they are keen to remind you, loitering is a crime punishable by death.
Elite Dangerous guide – missions
Seasoned commanders will always have a place in their heart for the Sidewinder, but the fact is it is not much good at anything in particular. It lacks range, firepower, and cargo space. This limits what you will be able to do in the early game so you will want to move on from it as soon as possible.
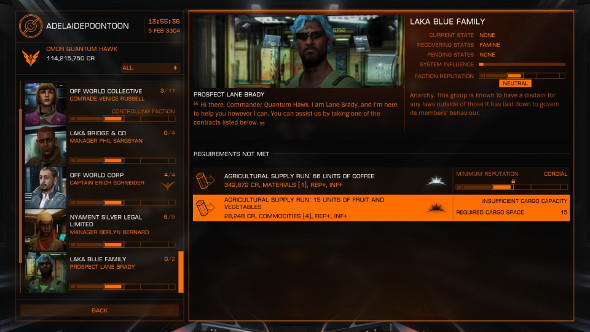
To do that, you will want to try to establish a home base to work from so you can make some cold, hard space dosh. Elite Dangerous takes a lot of factors into account when calculating its mission payouts. You will not be aligned with anyone when you are fresh in the cockpit, so start gaining a reputation with local factions and increase your system influence. Jobs you should be looking to pick up are:
- Boom Data Delivery – Boom data is great. This is digital data that needs to be shipped from one station to another. It doesn’t take up any cargo space so you can take on a maximum of 20 jobs if they are available. Should your ship be destroyed enroute you will not lose the data or fail the mission either, making it a low-risk affair.
- Boom Time Deliveries – Boom time deliveries have the same set up as data deliveries except this time you will be transporting physical goods. You will be limited to what you can carry based on your cargo capacity, and goods are lost if your ship is destroyed. These jobs are a little riskier but the payouts are usually higher.
- Passenger Missions – Tear out your cargo racks and put in some economy class cabins. Transporting workers or diplomats can be lucrative, but the payouts are currently under review.
- Planetary Scans – These involve flying to a planet’s surface and scanning a designated data beacon in your SRV (Elite’s version of the moon buggy). If you have bought the game with the Horizons expansion you can start with an SRV equipped.
You can make the early game – and the rest of it – considerably easier by investigating Elite Dangerous mods and installing them to your tastes.
Elite Dangerous guide – navigation
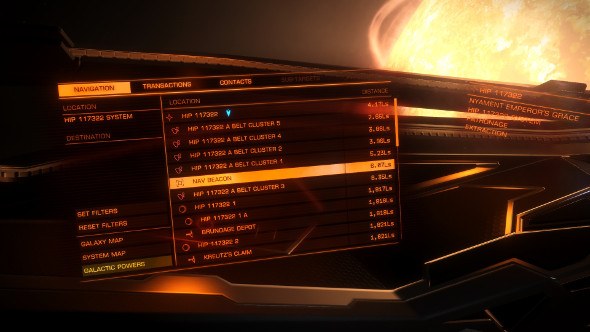
Now that you have got some errands to run you will need to know how to get your destination. You will spend the bulk of your time travelling either within a system or between systems. This is possible thanks to your ship’s in-built Frame Shift Drive (FSD).
Supercruise
This is how you travel around a system. A system will always have at least one star, around which it will have any number of planets and moons, stations, and asteroid belts. Supercruise is your faster-than-light travel that will get you between these bodies. It can be difficult to judge how far away you are from an object when distance is measured in light seconds (Ls). Not decelerating in time can result in you overshooting your target. So go into your key bindings and find the flight throttle section. Head down to “Set Speed To 75%” and map it however you like. If you hit this button when you’re about eight seconds away from your target, it will bring you in at the optimal speed and distance every time.
The Galaxy Map
This is your new best friend as you will be looking at it a lot, so bind it to a comfortable hotkey and study it. The map has plenty of filters to work with, encompassing everything from trade to political alignment. Make sure when planning a journey that you plot the route (the second button when you select a system) and do not simply select your target destination. You can then tailor what kind of route you want under the jump data filter.
- Economical Routes – Use less fuel overall but will take a greater number of jumps to complete.
- Fastest Routes – Sacrifice more fuel for a quicker journey involving fewer jumps.
The plotted course will be presented on the map as a solid orange line. If it becomes a dotted line, this is the point where you will run out of fuel, so plan accordingly and do not become stranded. Once you have got your route logged you just need to engage your FSD and be on your way.
Elite Dangerous guide – combat and outfitting
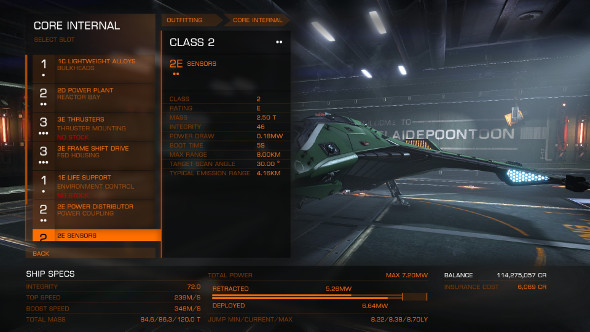
When you have some successful missions under your belt the next thing on your list should be outfitting your Sidewinder with some new modules. There is a wide variety to choose from, but you should always ensure your power needs do not exceed your power plant’s capacity. These items all have letters and numbers associated with them. Numbers denote their size. The higher the number, the bigger and better the module. These are limited by your ship’s slots. They also have letter grades that denote their utility.
- E: Basic module. Nothing fancy.
- D: The lightest modules. Good for improving speed and jump range.
- C: Middle of the road. Good balance between price and performance.
- B: The bulkiest modules. Can take a lot of hits.
- A: The best money can buy.
Outfitting Tip: There is rarely a need to upgrade your sensors or life-support systems past the D grade. Keep them light and reduce your mass.
Even if you are planning on being more of a space trucker than bounty hunter, every player should get comfortable with dogfighting. With that said, the ship you should be swapping your Sidewinder for is the Eagle. It is incredibly nimble, has good weapon locations, and remains one of the most enjoyable ships to fly.
Sales Tip: Selling your ship results in a 10% loss of value in the sale price. This includes the modules. Sell your old modules individually before you sell your ship to maximise your credit gain.
Focusing on combat now, you need two types of weapons to be an effective fighter.
- Kinetic – Cannons or multi-cannons. Deal direct damage to a ship’s hull. Ineffective againsts shields.
- Thermal – Pulse, burst, or beam lasers. Used for disintegrating a target’s shield. Generate a lot of heat.
You should look to affix twin-burst lasers and a multi-cannon on your Eagle to start with. Make sure they are gimballed, rather than fixed, so they will track your target. Next you will need to find your prey. You have two choices. You will find the odd criminal around Nav Beacons. Simply target a ship and you will automatically scan it. If it is flagged as “wanted” then you are free to engage. Try to pick fights with the Mostly Harmless or Novice targets at first. When you have logged a few combat hours you can try heading to a Resource Extraction Site. These can be found in the rocky rings around planets. All manner of malcontents patrol these areas, attacking miners, and therefore they present a tougher challenge. Speaking of tough challenges, have you investigated Elite Dangerous’s Thargoids?
Soon enough you will be ready for the next step up. The Adder is a fine purchase for pilots interested in hauling freight. The Imperial Eagle and Viper Mk 3 pack more firepower. Finally, for those looking for a good multipurpose ship and want to take their first steps as explorers, the Cobra Mk 3 will never do you wrong. So get out there and fly dangerous, Commander.
